Step by Step Guide: How to add a Transparent Outline with Canva Pro
1. Create the Outline
How to add the outline effect to text
Create a design with your Canva Pro account and select the text you where want to apply the transparent outline (this hack only works for text with the “Effects” tool) and use the outline effect to add your negative space. Change the outline to be the exact same color as the background.
How to add the outline effect to graphics
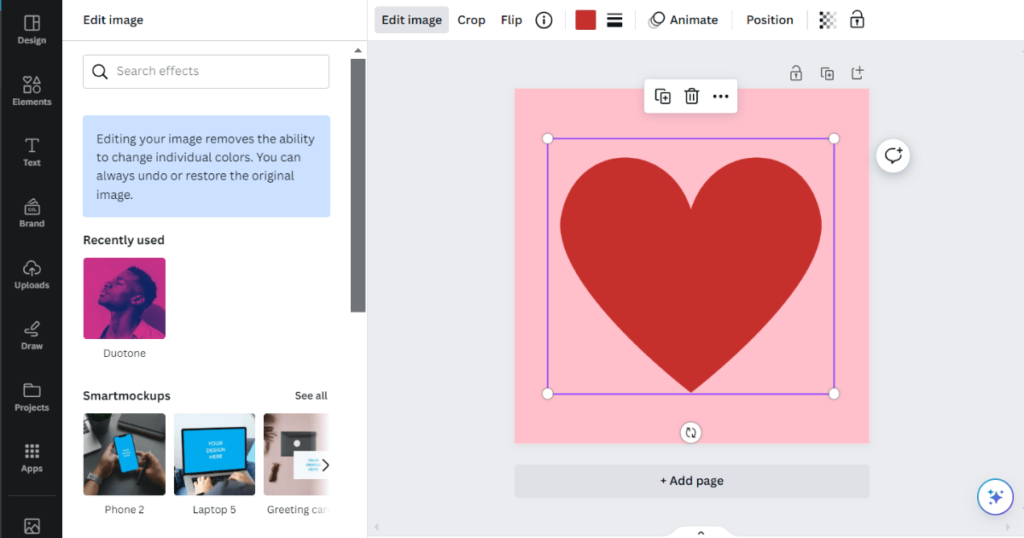
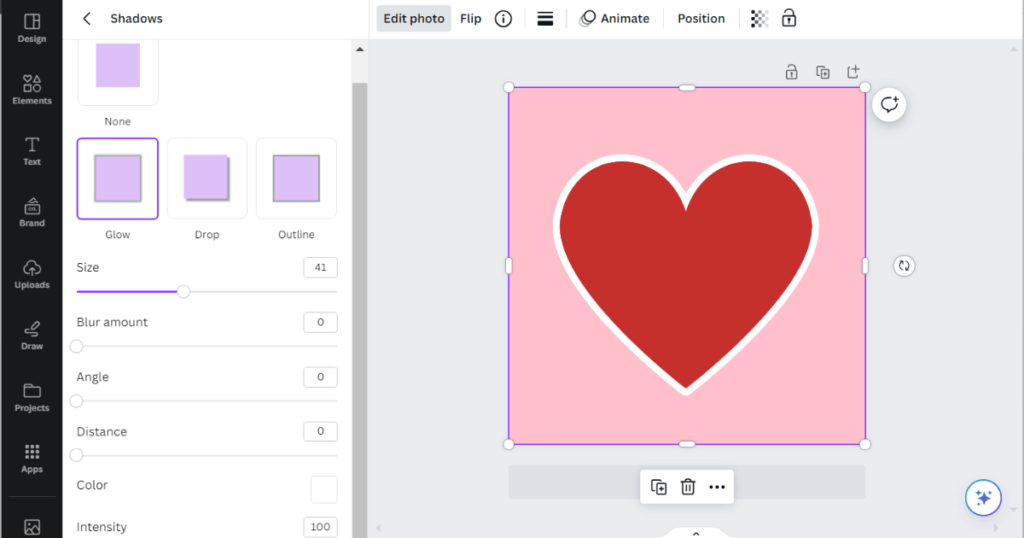
Select or upload a graphic or element and use the “shadows” tool to add a glow shadow. Note: this is where a lot of users have trouble because the shadow effect isn’t available for the element you selected (see image below) but there’s a quick and easy workaround. You’ll need to download the element (with a transparent background) and then upload it again as an image to get the full set of “edit photo” tools.

Change the blur setting to 0 and the intensity setting to 100. Adjust the size as desired and then change the shadow to be the exact same color as the background.
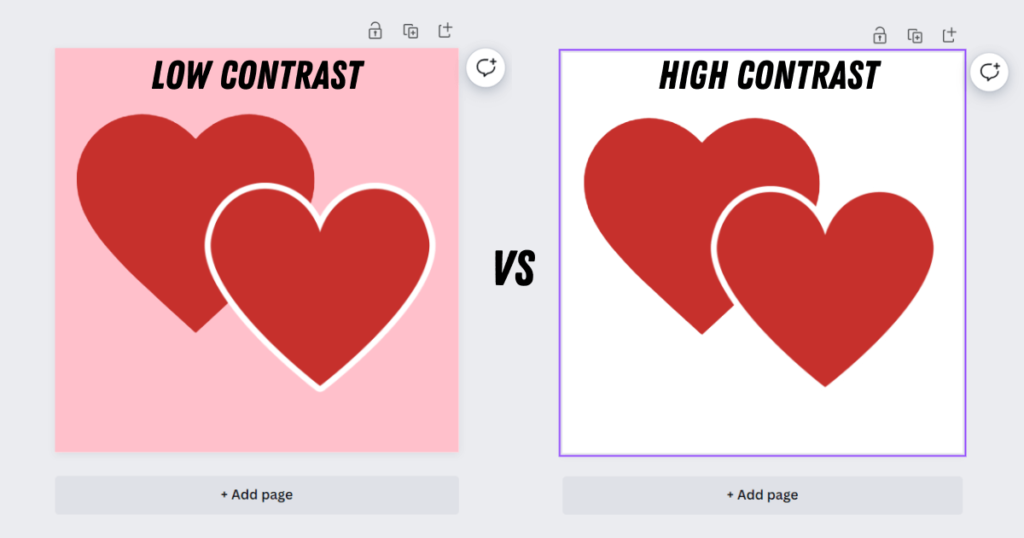
Tip: for best results use a background color that has high contrast to avoid any parts of you design being removed.

2. Download your Design
Download your design with the background (don’t use the transparent background feature).
3. Remove the Background and Outlines
Upload your design image to Canva and use the Background Remover tool which should remove the background and pieces that are the same color as the background. If there are parts of the outline aren’t detected and removed, try using a higher contrast background color.

4. Prepare for Print
Download your design with a transparent background and set the size to a minimum of 4000px so its ready to use in your print on demand store.

